
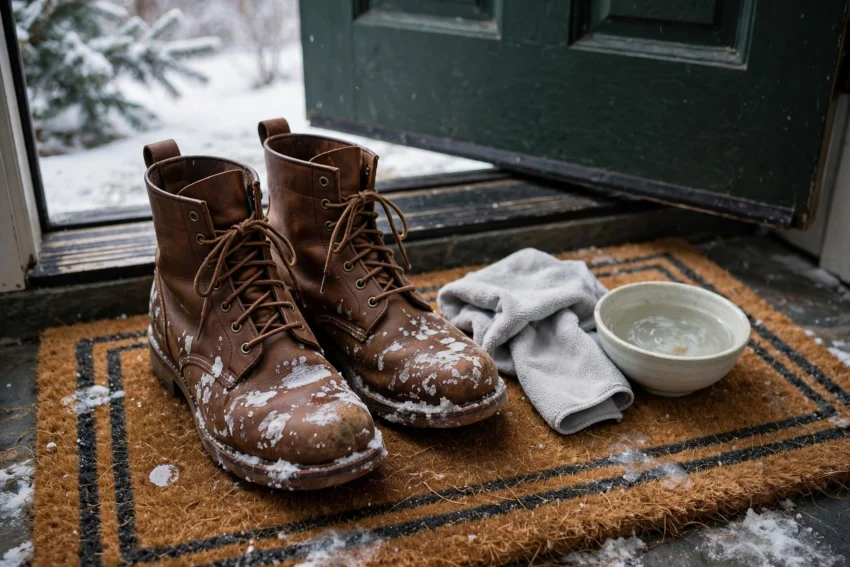
White rings on your boots after a winter walk are almost always road salt. Councils grit pavements when frost is forecast, and that grit splashes up as salty slush. It dries into a pale ring, and if it stays there, it dries the leather out too. The good news is that most fresh salt stains come out with a simple method, if you treat them early and use the right method for your leather type.
Direct answer: yes, salt stains come out if you treat them early
For smooth leather boots, brush off dry salt, then dab the mark with a cloth dampened with equal parts white vinegar and water. Wipe with a clean damp cloth, let the boots dry naturally, then condition smooth leather. For suede and nubuck, brush off dry salt first, then dab very lightly with a diluted vinegar and water mix, never soak the boot, let it dry fully, then brush the nap back. Do not use heat to dry boots, do not put boots in a washing machine, and do not proof over a salt stain. Proofing locks the mark in. Remove the stain first, condition smooth leather, then proof.
Why road salt stains boots
UK winter grit is usually rock salt spread on pavements and roads before frost. When you walk through gritted slush, salty water splashes onto the lower boot, the toe, and the welt where the upper meets the sole. As the water evaporates, the salt is left behind in the leather surface. That is the white ring you see.
Salt causes two problems. First, it leaves a visible mark. Second, it draws moisture out of leather. A boot left with salt on it for days can feel stiff and dry, and the surface can crack over time, especially on smooth leather. Suede shows salt differently. It looks chalky and the nap can feel stiff and matted where the salt has dried.
Salt stains are worst after a freeze and thaw cycle. You walk on gritted pavements, come indoors, and the boots dry by the door with the salt still on them. That overnight drying is when the ring sets. Wiping boots as soon as you get indoors is the single most useful habit in this whole guide.
What you need before you start
Gather everything before you touch the stain. You will need:
- A soft brush, or a suede brush for suede and nubuck
- Two clean soft cloths, white or light coloured, to avoid dye transfer
- White vinegar and clean water
- A small bowl for the vinegar and water mix
- A mild leather cleaner, if you have one, for smooth leather
- Leather conditioner for smooth leather, for after treatment
- Newspaper or boot trees, to hold the shape while boots dry
Do not use brown vinegar, bleach, washing up liquid, or a harsh household cleaner. Brown vinegar can stain light leather. Bleach and harsh cleaners can damage the finish and the colour. If you are unsure about a product, test it on a hidden area first, such as the inner ankle.
How to remove salt stains from smooth leather boots, step by step
This method is for smooth leather ankle boots, Chelsea boots, and other smooth leather boots. Work on one boot at a time, and do not rush the drying step.
Step 1: Brush off dry salt
Let the boots dry if they are wet, or work on them as soon as you get indoors. Brush the whole lower boot gently to remove loose salt and grit. Pay attention to the welt and the seams, where salt collects. Brushing first stops you rubbing grit into the leather in the next step.
Step 2: Mix the vinegar solution
Mix equal parts white vinegar and clean water in a small bowl. One part vinegar to one part water is the standard home mix for smooth leather. Use a fresh cloth for this step. Do not pour the mix directly onto the boot.
Step 3: Dab, do not scrub
Dampen the cloth with the mix and wring it out so it is damp, not dripping. Dab the salt mark gently, working from the outside of the ring towards the centre. This stops the ring spreading. Lift the cloth, check the mark, and repeat with a clean part of the cloth. Do not scrub hard. Scrubbing can wear the finish and push salt deeper into the leather.
For a stubborn ring, repeat the dabbing two or three times, with a short pause between passes. If the mark has not lifted after three gentle passes, stop and let the boot dry. A second attempt after drying is safer than one aggressive attempt.
Step 4: Wipe with clean water
Dampen a second clean cloth with plain water, wring it out, and wipe the treated area. This removes vinegar residue. Then wipe the whole boot lightly, so you do not leave a clean patch that stands out against the rest of the boot.
Step 5: Dry naturally
Stuff the boots lightly with newspaper or use boot trees, so they hold their shape. Let them dry at room temperature, away from radiators, fires, and direct sunlight. Heat dries leather fast and can crack it, especially after salt exposure. Do not wear the boots again until they are fully dry to the touch.
Step 6: Condition, then proof
Once dry, check how the leather feels. If it feels stiff or dry, apply a small amount of leather conditioner, let it absorb, then buff lightly with a clean cloth. Conditioning matters after salt treatment, because salt strips moisture and vinegar cleaning does not replace it. Only after conditioning, proof the boots again if they need it. Our guide on how to waterproof leather boots explains the right product for each leather type, and why seams and welts need extra attention.
How to remove salt stains from suede and nubuck boots (different method)
Suede and nubuck need a lighter touch. Water soaks into suede fast, and a soaked suede boot can watermark. The rule here is dab lightly, dry fully, and brush after.
- Let the boots dry fully if they are wet. Brush off dry salt with a suede brush, brushing in one direction.
- Dampen a clean cloth with a diluted mix of white vinegar and water, and wring it out well. The cloth should feel barely damp, not wet.
- Dab the salt mark very lightly. Do not rub, and do not soak the area. Work from the outside of the mark towards the centre.
- Let the boots dry naturally at room temperature, away from heat. Do not use a hairdryer.
- Once fully dry, brush the nap gently with a suede brush to restore the texture. Brush in one direction.
- If a faint ring is still visible, repeat once, with a lighter dab than before. If it still does not lift after two attempts, stop. A cobbler can advise on a professional clean, and repeated home treatment can push the mark deeper.
For a fuller suede routine, see our guide on how to clean suede ankle boots. That guide covers everyday suede cleaning, and its salt section matches the method here. White boots need extra care, because any colour change shows at once. For white leather and white suede, test on a hidden area first, and see our guide on how to clean white cowboy boots before you treat a large area.
| Boot material | Method | What to avoid |
|---|---|---|
| Smooth leather | Equal parts white vinegar and water, dab, wipe with plain water, condition after | Scrubbing hard, heat drying, proofing over the stain |
| Suede and nubuck | Lightly damp cloth, diluted vinegar mix, dab only, dry fully, brush nap after | Soaking the boot, wax, conditioner, oils, heat drying |
| Patent leather | Damp cloth with plain water only, wipe dry, soft buff | Vinegar, wax, conditioner, abrasive cloths |
When vinegar is unsafe (and what to use instead)
Vinegar is the standard home treatment for salt stains, but it is not right for every boot. Use this section before you mix anything, especially if your boots are light coloured, expensive, or already damaged.
Do not use vinegar when:
- The leather is cracked, torn, or peeling. Vinegar and water can get into cracks and make them worse. Take damaged boots to a cobbler first.
- The boots are patent leather. Patent has a coated finish. A damp cloth with plain water is enough for salt on patent. Vinegar can dull the coating.
- The boots are very light coloured and you have not tested. Vinegar is usually safe on dark leather, but test on a hidden area first on tan, cream, or white boots.
- The label says dry clean only, or the maker warns against wet cleaning. Follow the maker label over a general guide.
- You have already tried vinegar twice and the mark has not lifted. A third aggressive attempt is more likely to damage the finish than to lift the stain.
What to use instead:
- Plain water dabbing: For patent leather, and for a first attempt on delicate boots, a cloth dampened with plain water, wrung out well, and dabbed gently can lift fresh salt. Dry fully, then reassess.
- A specialist leather cleaner: A cleaner made for your leather type is the safer choice for expensive boots, light colours, and boots with mixed materials. Follow the label, test on a hidden area, and use a small amount.
- A suede eraser, for suede only: For dry salt on suede, a suede eraser used gently after brushing can lift surface salt before any wet method. Do not use an eraser on smooth leather.
- A cobbler, for set stains and damaged boots: If salt has been left for weeks, if the leather feels stiff and cracked, or if the stain covers a large area, a professional clean is cheaper than replacing the boots.
If you are unsure which material your boots are, check the care label inside the boot, or the product page where you bought them. Smooth leather feels flat and firm. Suede feels velvety and the colour shifts when you brush it. Nubuck feels smoother than suede but still matte. When in doubt, use the gentlest method that suits the most delicate material on the boot.
Conditioning after treatment: why it matters
Salt treatment cleans the stain, but it does not restore the leather. Salt draws moisture out, and cleaning removes surface oils as well. Smooth leather that feels stiff after treatment needs conditioner. Without it, the leather can dry and crack over the next few weeks, even though the white ring is gone.
After the boots are fully dry, apply a small amount of leather conditioner to smooth leather only. Rub it in with a clean cloth, in small circles, and let it absorb. Buff lightly once it has absorbed. Do not condition suede, nubuck, or patent leather. Suede and nubuck need a suede protector spray instead, applied only after the boots are fully dry and brushed. Patent leather needs no conditioner.
Conditioning also helps the next coat of proofer sit evenly. If you proof a dry, unconditioned boot, the proofer can sit unevenly and leave a patchy finish. The order is: remove the stain, dry, condition smooth leather, then proof. Never proof over a salt stain, and never condition a boot that is still damp.
Prevention: waterproofing, wiping routine, and storage
Removing salt stains is easier than preventing them, but prevention takes less time than treatment, and it protects the leather over the whole winter.
Wipe boots as soon as you get indoors
Keep a damp cloth by the door in winter. Wipe the lower boot, the toe, and the welt as soon as you come in from gritted pavements. This takes under a minute, and it stops salt drying on the leather overnight. If you do nothing else in this guide, do this.
Proof before winter, and reapply after salty weeks
Waterproofing slows salt water from soaking in. It does not make boots salt proof, but it gives you time to wipe them before the salt sets. Proof smooth leather and suede boots before the first gritting, and reapply after a salty week, even if you proofed recently. Our guide on how to waterproof leather boots gives a UK reapplication schedule by wear and weather, plus the seam and welt spots most people miss.
Rotate pairs and dry properly
Do not wear the same pair two days in a row if they are still damp from the day before. Rotate pairs if you can. Stuff damp boots lightly with newspaper, change the newspaper after a few hours if it is very damp, and let them dry at room temperature. Store boots upright, with boot trees or rolled newspaper to hold the shaft straight, in a cool dry place, not in a damp hallway or a sealed plastic box.
Choose the right boots for gritted days
On days when pavements are heavily gritted, and you know you will walk through slush, choose boots you can wipe easily, and save delicate suede for drier days. This is not about avoiding suede all winter. It is about matching the boot to the day, so the boots you love last longer.
Mistakes that make salt damage worse
- Leaving salt on boots overnight, or for days, so the ring sets and the leather dries out
- Proofing over a salt stain, which locks the mark in under the coating
- Scrubbing hard, which wears the finish and can push salt deeper
- Soaking suede or nubuck, which can leave watermarks that are harder to fix than the salt mark
- Using heat to dry boots, which cracks leather and weakens glue
- Using bleach, brown vinegar, or harsh household cleaners, which can stain and damage the finish
- Conditioning suede or nubuck, which flattens the nap and can stain
- Wearing damp boots again the next day, which keeps the leather wet and softens the shape
- Skipping the test patch on light coloured boots, and finding a colour change on the whole boot
If you have made one of these mistakes, stop, let the boots dry naturally, and reassess. For smooth leather, a light clean and condition can often fix a stiff finish. For suede, a gentle brush once dry can restore some texture. If the damage looks serious, or the leather is cracked, take the boots to a cobbler rather than trying another home method.
Frequently asked questions
Does vinegar remove salt stains from boots?
Yes, for most smooth leather and suede boots, when used diluted and dabbed, not scrubbed or poured on. Use equal parts white vinegar and water for smooth leather, and a lightly damp cloth with a diluted mix for suede. Test on a hidden area first, and do not use vinegar on patent leather, cracked leather, or boots labelled dry clean only.
How do you remove salt stains from suede boots without ruining them?
Brush off dry salt first, then dab very lightly with a barely damp cloth and a diluted vinegar and water mix. Never soak suede. Let the boots dry fully at room temperature, then brush the nap in one direction. If the mark does not lift after two light attempts, stop and ask a cobbler. Repeated wet treatment can watermark suede.
Can salt stains be removed after they have dried?
Yes, in most cases, if the leather is not cracked. Fresh stains lift easiest, but a dried ring usually lifts with the same dabbing method, repeated gently after drying. Stains left for weeks are harder, and may need a specialist cleaner or a professional clean, especially on suede.
Should you use water or vinegar on salt stained boots?
For fresh salt on smooth leather, vinegar and water is the standard method, because vinegar helps dissolve the salt residue. For patent leather, use plain water only. For suede, use a diluted vinegar mix on a barely damp cloth, and stop if the boot starts to soak. Plain water dabbing is the safer first attempt on delicate or light coloured boots.
Do salt stains damage leather permanently?
They can, if left. Salt draws moisture out of leather, and long term salt exposure can dry and crack smooth leather, and stiffen suede. A stain treated promptly, followed by conditioning for smooth leather, usually leaves no lasting damage. Cracking, peeling, or a stain that has set for a long time may need professional help.
How do you prevent salt stains on boots in the UK?
Wipe boots with a damp cloth as soon as you get indoors from gritted pavements. Proof boots before winter, and reapply after salty weeks. Rotate pairs so damp boots dry fully. Store boots upright and dry. On heavily gritted days, choose boots that wipe clean easily.
Can you put salt stained boots in the washing machine?
No. Leather and suede boots should never go in a washing machine. Water and agitation can warp the shape, damage the finish, and ruin suede nap. Clean salt stains by hand, with the dabbing method in this guide.
What if the salt stain is still visible after cleaning?
Let the boots dry fully first, because a damp boot can look stained when it is only wet. Once dry, brush suede, or buff smooth leather lightly. If a faint ring remains, repeat the dabbing once, gently. If it still remains after two attempts, condition smooth leather and proof, and accept a faint mark, or take the boots to a cobbler for a professional clean. Do not keep scrubbing.
Conclusion
Salt stains look alarming, but most come out with a calm method: brush off dry salt, dab gently with vinegar and water for smooth leather, dab very lightly for suede and nubuck, dry naturally, and condition smooth leather after. Do not proof over a stain, do not use heat, and do not soak suede. The habit that saves the most boots is the simplest one: wipe them as soon as you get indoors from gritted pavements, and proof them before winter. Do that, and your boots will get through UK winter in far better shape.
Next in the boot care cluster: how to store boots so they keep their shape, then a boot fit and calf measurement guide.