
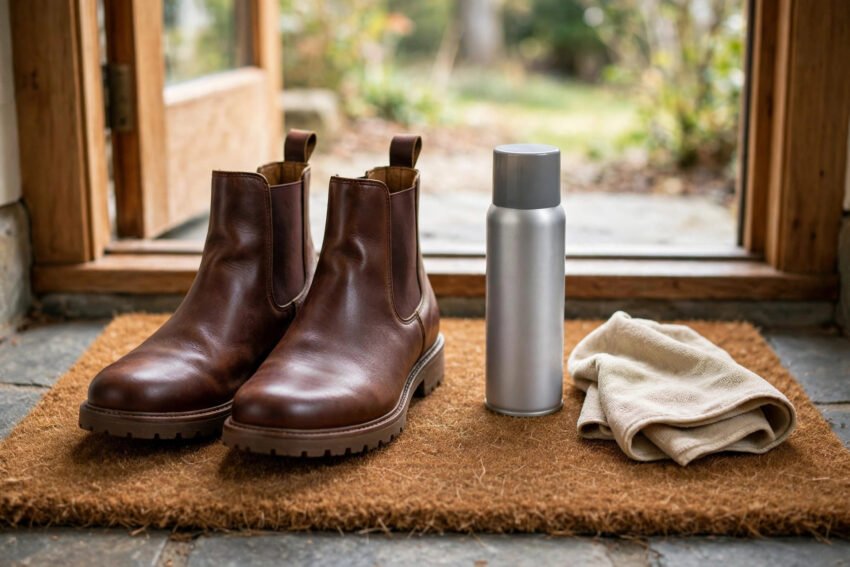
Rain in the UK rarely arrives as one heavy storm and then clears. It arrives as drizzle on the commute, puddles on pavements, wet grass at a wedding, and grit on winter roads. That steady damp is what wears leather boots down. Waterproofing does not make fashion boots into wellington boots. It slows water intake, helps water bead and roll off, and gives you time to get indoors before the leather soaks through.
Direct answer
To waterproof leather boots, clean them first and let them dry, then apply the right proofer for the leather type. Use wax or a spray made for smooth leather on smooth leather boots. Use a spray made for suede and nubuck on suede and nubuck boots. Cover the seams and the welt where the upper meets the sole. Let the boots dry naturally for at least 24 hours before you wear them in rain. In the UK, reapply spray every 4 to 6 weeks in wet months, and wax every 2 to 3 months, or sooner if water stops beading.
What waterproofing can and cannot do
It helps to set expectations before you buy a product.
Waterproofing can:
- Help water bead on the surface instead of soaking straight in
- Slow down staining from rain, puddles, and light road salt
- Keep leather supple by adding a protective layer
- Make future cleaning easier, because dirt sits on the surface
Waterproofing cannot:
- Make stitched fashion boots fully waterproof
- Seal every seam, zip, and join against standing water
- Fix leather that is already cracked, torn, or peeling
- Replace drying boots properly after they get soaked
Think of it as a raincoat for your boots. A raincoat keeps you dry in normal rain. It does not keep you dry if you stand in a river. The same logic applies here.
Which leather type you have
The product you choose depends on the leather type. Using the wrong product is the most common mistake. It can darken suede, flatten the nap, or leave a sticky finish.
Smooth leather
Smooth leather has a flat, polished surface. Most black leather ankle boots, Chelsea boots, and office boots are smooth leather. It feels firm and looks even. Water beads on it for a short time when new, then soaks in as the finish wears.
Suede
Suede has a soft, velvety nap. It feels matte and slightly fuzzy. Suede ankle boots and suede Chelsea boots fall in this group. Suede stains easily and marks if it gets too wet. It needs a light touch and a suede safe spray.
Nubuck
Nubuck looks like suede but feels smoother and slightly firmer. It is sanded on the outer side of the hide, while suede is sanded on the inner side. Many casual boots and desert style boots use nubuck. Treat nubuck like suede: use a spray made for suede and nubuck, not wax.
Patent leather
Patent leather has a shiny, coated finish. It already resists water better than other leather types. Do not use wax or heavy conditioner on patent leather. A soft cloth and a patent safe spray, if needed, is enough. If you are unsure, test on a hidden area first.
How to check if you are unsure
Rub the surface lightly with a clean fingertip. If it feels smooth and shiny, it is likely smooth or patent leather. If it feels velvety and the colour shifts when you brush it, it is likely suede or nubuck. If you still cannot tell, check the care label inside the boot or the product page where you bought them.
Which proofing product suits each leather type
| Leather type | Best product type | Avoid |
|---|---|---|
| Smooth leather | Wax, or spray made for smooth leather | Suede only sprays, heavy oils |
| Suede | Spray made for suede and nubuck | Wax, conditioner, oils |
| Nubuck | Spray made for suede and nubuck | Wax, conditioner, oils |
| Patent leather | Soft cloth, patent safe spray only if needed | Wax, conditioner, oils |
Spray proofers
Sprays are the easiest option for most people. They give even coverage and work well on suede and nubuck. They also work on smooth leather. The trade off is that sprays wear off faster. You will need to reapply more often in wet months.
Use a spray when:
- Your boots are suede or nubuck
- You want a quick, even coat
- You wear your boots in light to moderate rain
- You are proofing boots with mixed materials
Wax proofers
Wax gives a longer lasting barrier on smooth leather. It also conditions the leather while it protects it. Wax takes more time to apply well. It can darken light leather slightly, so test it first if your boots are tan, cream, or white.
Use wax when:
- Your boots are smooth leather
- You wear them often in heavy rain
- You want longer protection between applications
- The boots are dark enough that a slight colour change is acceptable
Conditioner vs proofer
Conditioner and proofer are not the same job. Conditioner keeps leather soft and stops it drying and cracking. Proofer adds water resistance. Some wax products do both. Many sprays only proof. If your boots feel dry and stiff, condition them first, let the conditioner absorb, then proof them. Do not skip conditioning after salt exposure. Salt dries leather out, and proofing alone does not replace the lost moisture.
What you need before you start
Gather everything before you apply anything. You will need:
- A soft brush or old toothbrush for seams
- A clean soft cloth (white or light coloured, to avoid dye transfer)
- Mild leather cleaner, or lukewarm water with a drop of gentle soap
- The right proofer for your leather type
- Newspaper or boot trees for drying
- A well ventilated room, away from radiators
Do not proof boots that are dirty, damp, or dusty. Dirt trapped under wax or spray stops the product reaching the leather. It can also lock in stains.
How to waterproof leather boots step by step
This method is for smooth leather boots. For suede and nubuck, see the next section.
Step 1: Clean the boots
Remove the laces if your boots have them. Brush off loose dirt and dust. Wipe the uppers with a cloth dampened with clean water and a small amount of mild leather cleaner. Pay attention to the welt, the seams, and around the sole. Let the boots dry naturally at room temperature. Do not use a radiator, a hairdryer, or direct sunlight to speed this up. Heat dries leather and can crack it.
If your boots are suede, read our guide on how to clean suede ankle boots before you proof them, because suede needs a dry cleaning method first.
Step 2: Test the product
Apply a small amount of proofer to a hidden area, such as the inner ankle or behind a strap. Wait for it to dry. Check for colour change or a sticky finish. If the colour changes more than you accept, choose a different product. This test takes a few minutes and saves a ruined pair of boots.
Step 3: Apply the first coat
For spray: Hold the can about 15 cm away from the boot. Spray in slow, even passes. Cover the whole upper, including the tongue area and the back seam. Do not soak one spot.
For wax: Put a small amount of wax on a clean cloth. Rub it into the leather in small circles. Work one section at a time. Use a thin, even layer. Thick layers do not protect better. They leave a sticky finish and attract dirt.
Step 4: Work the seams and welt
This is the step most people skip. Seams and the welt are where water gets in first. Use a soft brush or the edge of the cloth to work a small amount of product into every seam, stitch line, and join around the sole. Be gentle. You are pressing product into the stitching, not scrubbing it away.
Step 5: Let the boots dry and cure
Leave the boots in a well ventilated room for at least 24 hours. Stuff them lightly with newspaper or use boot trees so they hold their shape. Do not wear them until they feel dry to the touch and no longer tacky. If the product instructions say to apply a second coat, do it after the first coat has dried, not while the boots are still wet.
Step 6: Buff and check
Once dry, buff smooth leather lightly with a clean cloth. Check the water beading test: flick a few drops of water on the boot. If the water beads and rolls off, the proofing has worked. If the water spreads and darkens the leather, apply one more thin coat and let it dry again.
How to waterproof suede and nubuck boots (different method)
Suede and nubuck need a gentler method. Do not use wax, conditioner, or oils on them.
- Let the boots dry fully if they are damp. Never proof wet suede.
- Brush the nap gently with a suede brush. Brush in one direction.
- Hold a suede safe spray about 15 cm away. Spray in light, even passes. Do not soak the boots.
- Let the boots dry naturally. Do not use heat.
- Once dry, brush the nap again lightly to restore the texture.
- Test the water beading on a small area. If water still soaks in, apply one more light coat.
If your suede boots already have stains, clean them first. Proofing over a stain can lock it in. For white suede or white leather, test on a hidden area and expect to use a light spray rather than wax. For white cowboy boots, see our guide on how to clean white cowboy boots before proofing, because white leather shows colour change more easily.
Seams, welts, and zips: the spots most people miss
Most boots fail at the joins, not in the middle of the leather.
- Seams: Stitching creates tiny holes. Water follows stitching into the boot. Work proofer into each seam.
- Welt: The welt is the strip where the upper meets the sole. It collects water when you walk through puddles. Give it an extra pass.
- Zips: Do not coat a zip with wax. Wipe the zip area clean and keep proofer off the teeth. A waxed zip can stick.
- Tongue and ankle opening: Rain runs down the leg into the boot. Make sure the tongue and the top edge are proofed, but do not block the opening with thick wax.
- Soles: Proofing is for uppers, not soles. If the soles are worn smooth, no spray will stop water coming through the bottom. That is a repair job, not a proofing job.
How often to reapply in the UK
Reapplication depends on how often you wear the boots, how much rain they face, and which product you used.
| Situation | Spray | Wax |
|---|---|---|
| Daily wear, wet months (October to March) | Every 4 to 6 weeks | Every 2 to 3 months |
| Weekly wear, wet months | Every 6 to 8 weeks | Every 3 to 4 months |
| Occasional wear, dry months | Every 2 to 3 months | Every 4 to 6 months |
| After heavy rain or salt exposure | Check beading, reapply if needed | Check beading, reapply if needed |
Signs it is time to reapply
- Water no longer beads, it spreads and darkens the leather
- The boots feel dry and look dull after cleaning
- You see salt marks after winter walks
- The boots have been through several heavy downpours since the last coat
Reapplying on time matters more than using an expensive product once. A cheap spray applied regularly will protect better than a premium wax applied once and forgotten.
Aftercare: conditioning, drying, and storage
Waterproofing is one part of boot care. What you do after rain matters just as much.
Drying wet boots
When boots get soaked, stuff them lightly with newspaper to hold their shape and absorb moisture from inside. Change the newspaper after a few hours if it is very damp. Let them dry at room temperature, away from radiators. Do not wear the same pair two days in a row if they are still damp. Rotate pairs if you can.
Conditioning
After boots dry, check if the leather feels stiff or dry. If it does, apply a small amount of leather conditioner to smooth leather, let it absorb, then buff. Do not condition suede or nubuck. Conditioning keeps smooth leather from cracking. It also helps the next coat of proofer sit evenly.
Storage
Store boots upright, not folded or crushed. Use boot trees or rolled newspaper to keep the shaft straight. Keep them in a cool, dry place, not in a damp hallway or a sealed plastic box. If you store boots for summer, clean and proof them before you put them away, then check them before you wear them again in autumn.
For fit and sizing, see our guide on how to choose the right cowboy boot size. The same measuring ideas apply to calf width and shaft height on other boot types.
Salt stains and waterproofing: prevention
UK winter grit is hard on leather. Road salt leaves white rings, dries leather, and can crack it if left. Waterproofing helps because it slows salt water from soaking in. It does not make boots salt proof.
To reduce salt damage:
- Wipe boots with a damp cloth as soon as you get indoors after a gritted pavement
- Do not let salt dry on the leather overnight if you can avoid it
- Condition smooth leather after salt exposure, because salt strips moisture
- Reapply proofer after a salty week, even if you proofed recently
If salt marks have already appeared, do not proof over them. Remove the marks first, condition, then proof. A dedicated salt stain guide will follow this article as the next post in the boot care cluster.
Mistakes that damage leather
- Proofing dirty boots: traps dirt and stains under the coating
- Using wax on suede or nubuck: flattens the nap and can stain
- Using heat to dry boots: cracks leather and weakens glue
- Applying thick coats: leaves a sticky finish and attracts dirt
- Skipping the test patch: risks a colour change on the whole boot
- Proofing over salt stains: locks the salt marks in
- Forgetting seams and welts: leaves the weakest spots unprotected
- Storing boots damp: causes odour and can damage the lining
If you have made one of these mistakes, do not panic. Wipe off excess product with a clean cloth, let the boots dry, and brush suede gently. For smooth leather, a light clean and recondition can often fix a sticky finish.
How to choose the right product in a UK shop
You do not need a long list of products. You need the right type for your boots.
- For smooth leather fashion boots: a spray made for smooth leather, or a wax if you want longer protection
- For suede or nubuck: a spray labelled for suede and nubuck only
- For mixed materials: use the gentlest product that suits the most delicate material on the boot
- For light colours: choose a spray, test first, and avoid wax unless the label says it is safe for light leather
Read the label. If it says it is for hiking boots only, it may still work, but check that it suits fashion leather. If it says it is for suede only, do not use it on smooth leather. Price is not a reliable guide. A mid priced spray that matches your leather type will beat an expensive wax used on the wrong material.
For trainers, the rules are different. Canvas and knit trainers need a different method. See our guide on how to remove yellow stains from white sneakers for trainer care, and do not use boot wax on trainers.
When to skip proofing and get a repair
Proofing cannot fix:
- Cracked leather that splits when you bend the boot
- Soles that have come away from the upper
- Zips that no longer close
- Lining that is torn or soaked through
In those cases, a cobbler can advise on resoling, re stitching, or replacing a zip. Proofing after a repair will then protect the repaired boots.
FAQs
Is leather waterproof?
No. Even full grain leather is water resistant, not waterproof. It will absorb water if it stays wet. Proofing slows that process and helps water bead, but it does not make fashion boots waterproof. For standing water, wear wellington boots or waterproof walking boots.
Can you waterproof suede boots?
Yes, with a spray made for suede and nubuck. Do not use wax, conditioner, or oils on suede. Apply light coats, let the boots dry naturally, and brush the nap after. Test on a hidden area first.
Does waterproofing change the colour of leather boots?
It can, especially on light leather. Wax is more likely to darken leather than spray. Always test on a hidden area. If the test area darkens more than you accept, choose a spray and test again.
How long does waterproofing last on leather boots?
It depends on wear and weather. In UK wet months, spray lasts about 4 to 6 weeks with daily wear. Wax lasts about 2 to 3 months. Check the water beading test. When water stops beading, it is time to reapply.
Can you wear leather boots in the rain after waterproofing?
Yes, in normal rain. Waterproofing gives you protection for commutes, shopping, and everyday wear. It does not make boots suitable for standing in puddles, walking through flooded streets, or long hikes in heavy rain.
What if your boots get soaked anyway?
Stuff them with newspaper, let them dry naturally away from heat, then condition smooth leather once dry. Do not wear them again until they are fully dry. Once dry, check the water beading and reapply proofer if needed.
Should you waterproof new leather boots?
Yes, after a test patch. New boots benefit from proofing before their first wet day. Clean them lightly first, even if they look clean, because shop dust and handling can affect how the proofer sits.
Can you use waterproofing spray on Chelsea boots?
Yes, if you match the product to the material. Leather Chelsea boots take spray or wax. Suede Chelsea boots take suede safe spray only. See our comparison of Chelsea boots vs chukka boots for help choosing between these styles before you proof them.
Conclusion
Waterproofing leather boots is a simple habit that pays back all winter. Clean first, match the product to the leather type, cover the seams and welt, and reapply on a UK schedule. For smooth leather, wax or spray both work. For suede and nubuck, use a suede safe spray only. Wipe off salt promptly, dry boots naturally, and condition smooth leather when it feels dry. Do that, and your boots will handle UK rain far better, and last longer too.
Next in the boot care cluster: how to remove salt stains from boots, then a boot fit and calf measurement guide.